Feeds:
Posts
Comments

I’ve been waiting for a while now for January flash photography shots to come in and I’m not sensing that any are coming…I’m wondering if it wasn’t such a good assignment or if people have been really busy.  The main point though of this club is to have fun so maybe a photo free for all send in your best shot(s) for the month will be energizing!

I can’t wait to see what comes…there’s been so much snow on the East Coast and who knows what will come from the West and North.  Can’t wait to see your pictures! Happy shooting!

I was thinking about our flash photography assignment and thinking about the on camera flash that we all have and how to get better results from those flashes.  So I was googling around looking for products that you can buy to help diffuse the flash.  Usually the on camera flash if very harsh and very strong and overwhelming to whatever you are photographing.  I have to admit this is really the first test I’ve made in a long time of my on camera flash vs. my off the camera flash.  The results were surprising to me…the results are close.  I think what’s happened is the sensors on the camera and the flashes are incredibly sensitive and have come a long way.  I’m very excited to see everyone’s pictures at the end of the month to see what kind of results good and bad that you are getting with your flash and your thoughts.

Back to my diffuser idea.  On my extra flash I have pulled down the diffuser screen and attached the diffuser box  on top of the flash then.  I generally try to get a soft almost natural light to my flash work especially when they involve people.  I’m looking for something that is flattering to skin tones and not strong.  So I’ve seen this little device made by Gary Fong called the Puffer-Pop-up diffuser which is basically what I wondering about.  Then I started wondering if there was anything I could make that would diffuse it.  I’m a big one for googling first rather than reinventing the wheel.  Lo and behold I found a guy who was having the same thought.  He made a little diffuser, here’s his DIY flash diffuser so you can basically see how to make one yourself.  So this afternoon I tried to replicate his diffuser and here are my results.  I tested my on camera flash with my homemade diffuser against my added flash straight and then with the diffuser box on it.  The results are not as obvious as I thought they would be.  They are more subtle but still there.  Taking pictures vertically with the homemade diffuser might be a little hard…just because it kinda just sits on top of the camera and might want to fall off if turned vertically.

Picture 1 is using my on camera flash straight …on the auto setting letting the camera control everything.  Look for small shadows in the windows and the shingles in the houses for detail.

picture 1

Picture 2 is using my on camera flash but popping my homemade diffuser on top.  Notice the subtle warmer color of the bricks and the better detail in the houses and their colors–especially the roofs and shingles. These are a little more vibrant in their color.

picture 2


Picture 3 is using my additional flash (Nikon SB-900) and having it at the 90 degree bend so that the flash head is directly facing the subject. I think the results are similar to picture 1. Again differences are subtle here.

picture 3


And finally Picture 4 is putting all my diffuser gear on my flash head and shooting and bouncing my flash off my white ceiling.

picture 4


I think the desired lighting effects are on Picture 2 & Picture 4.  I was really surprised at how much the little DIY diffuser worked.   One more little comparison for you with skin tones.

Picture A of Erin is with my built in camera flash straight up – letting the camera decide all settings.
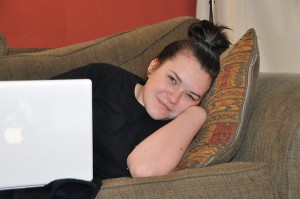
erin-A


Picture B of Erin is adding my little homemade diffuser.
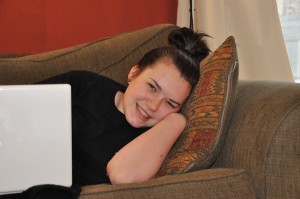
erin2


Here again…subtle but warmer tones.  Shelley I wish I could think of a way to effect your flash  on your camera just for you to experiment but for now you get a pass on this…maybe I’ll come up with a little contraption for you too one day!

If you like the warm effects you might want to invest in the Gary Fong product just for longevity sake since it’s made of a hard plastic.  But I think the homemade diffuser lets you play a little and lets you look for those changes in light that you can effect.

So for the Optional Assignment #5  Diffusing the flash on your camera — make or buy a diffuser and show us your before and after shot and tell us what you think.   Don’t hesitate to add questions to the comment section here – and happy shooting!

We all love existing light but sometimes there just isn’t enough of it and we need some help.  Our little wonder flash on our camera can provide so much firepower it’s amazing sometimes.  Have you ever had your shot all ready to go, use your flash and when you look at your picture you either got ghosts as people because the light was so strong and overwhelming or you end up with those red-eyed people.

If you have an additional flash that can be mounted on top of the camera you’ve got some new skills you can learn.  Bouncing your flash, using various diffusers and even lowering the power of the flash to accomodate your picture can all be strategies to get the picture you’re trying for.  But those extra flashes can be expensive and most people don’t have that. 

So for everyone that only has a flash that’s part of your camera let’s get creative and try using different modes to test our flashes.

Assignment #5 – Use your flash for your assignment pictures.  You’ll probably be able to see the results best  if you use it indoors.  I encourage you to take pictures near and far to get used to your flash.  Keep in mind, composition and depth of field — still important details for flash photography.  If you have an extra flash go crazy!  Try bouncing it and using it at all different angles and see if you get some interesting effects.  Make sure when you send your pictures at the end of the month you talk about your likes, dislikes, problems encountered and things you wish your flash did that you’re not able to achieve.  Adding links to your other pictures would be great too.  Send your pictures anytime!

For an optional assignment – I’m going to post instructions with pictures or maybe a little video showing you how to make a diffuser for your on the camera flash so that we can experiment with softer flash.  For cameras that are not slr’s – I’m going to try and figure something out there too!  Stay tuned – I’ll make sure I send an email when I have the optional assignment ready. 

If you have any questions or want to talk through anything please don’t hesitate to email or better yet start the conversation here in the comments to this post.   🙂

So, both of these pictures came from our holiday party. I really like how playing with the depth of field lets you make the picture feel dreamy. I have a Lensbaby, http://www.lensbaby.com/, and it is great fun for these types of things too. I can also use the lensbaby like a tiltshift lens to make some things seem miniature.

Picture info:  f1.8, 1/40, ISO 800, 50mm

Picture info: f1.8, 1/50, ISO 400, 50mm 

Christmas in LA Downtown

With Christmas lighting, I ran into the same issues as with the depth of field. I had these great plans to get wonderful and cheezy Christmas pictures. I actually went to differrent parts of Los Angeles with my tripod but I haven’t found any really nice Christmas site. Maybe Christmas in LA is just not cheezy. This is simply how it looks – Christmas in LA Downtown.
Settings:  f/22, 10, ISO 1600, 21mm

Christmas at the cemetery

After I read about the depth of field assignment, I thought of hundreds of pictures I will be  taking.  And now, in January, I found out I only have three. This one, I took when I went to a Catholic cemetery before Christmas. In Eastern Europe, the cemeteries look very different from those here in the US. For Christmas, we bring there small christmas trees, dried flowers and thousands of candles.  Although without candles, people decorated this cemetery in LA with trees, poinsettias, artificial snow and other creative stuff.  I have chosen this tiny Bethlehem scene.
Settings:  f/5.6, 1/60, ISO 1600, 18mm

I had so many ideas for where I wanted to go to take pictures of lights at night and cool things I wanted to try but life and time got away from me…I’ll have to try next year!  I did get down my street though and shoot this impressive tree and for fun I was playing in photoshop with it.  I couldn’t decide which I liked best so I decided to put all three together..the color version, the negative version and the black and white.  I thought each one was kinda cool and they kinda worked as a trio of pictures together!
Settings: f 4.5, 1/.0769, ISO 3200, 40mm  (Thank goodness for my high ISO setting)

This is my favorite picture of narrow depth of field.  I was lucky enough to get to Myrtle Beach, South Carolina right after Christmas and while there were’nt tons of birds I did get some long looks at some fun ones.  This little sanderling was so focussed on getting food in the sand he didn’t care how close I was to him.  There were times I almost felt like I could pick him up.  I love the narrow depth of field here because he is the star of the show!  You can see that some of the sand in front of him and the water bubbles behind him are all soft and just out of focus.  Here again I achieved my depth of field by using a longer focal length and zooming in.  This really helps all of the detail in his feathers just pop because your eye has no distractions in looking at him.  If you look closely you can see the horizontal plane of focus where the bird, sand and water are all in focus.  I took many other pictures of him and had a hard time choosing but I liked this one because it showed him in his habitat and it almost seemed like he was going to run right out of the picture!
Settings: f7.1, 1/3200, ISO 800, 230mm

I decided to share 2 very different pictures showing  narrow depth of field.  Here I achieved the narrow depth of field more with my focal length than my aperature.  I was wanting to have as many birds in Jordan’s background as possible because of her love of birds.  Because of the birds I also wanted to frame her a little differently…hence the off center horizontal framing.  My own critique is the depth of field is so narrow actually it’s hard to tell the gulls are birds… but I liked this one the best of Jordan.  This is an example though of how Jordan really is the star of the show and the background is not distracting your focus. You tend to check out the background but I generally think your eye goes back to Jordan’s smile.  For me this is a much wider portrait than I normally take so it was fun to play with trying to take it differently.  The other pictures I took at this time can be seen here.
Settings:  f 7.1, 1/800,  ISO 800, 90 mm

The Capitol Christmas tree — not as sharp as I would have liked, but I didn’t have a tripod yet and I didn’t like the shots with the flash
 Settings: f/2.8, 1/20, ISO 1250, 6mm

I can’t decide which one of these I like better; I don’t really like seeing the stool that Santa is sitting on in the wider shot and that one seems a tilted a little drunkenly, but the tighter one is missing something…?
 Settings for Santa 1:  f/3.6, 1/25, ISO 1250, 10mm

Settings for Santa 2:  f/2.8, 1/20, ISO 1250, 6mm

My favorite ornament on our Christmas tree…..I was trying to follow this month’s lesson so am eager to hear everyone’s comments on whether or not they think this lives up to an example of “depth of field” or not….  
Settings:  f/2.8, 1/25, ISO 1250, 6mm

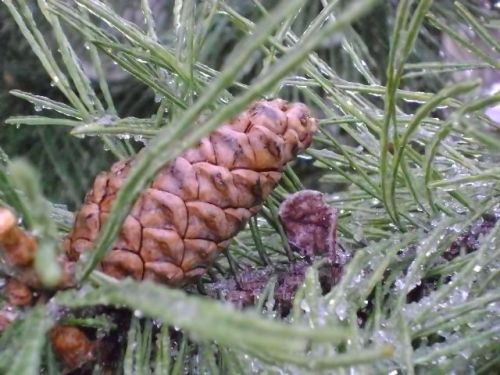
I love how everything looks when it’s first covered with snow or ice in the winter and I was determined not to miss the photo opportunity even if I had to go to work, so I whipped out my tripod since I was there 15 minutes early and took pictures of the pine trees at the back of our company parking lot!  I think it’s a fair example of depth of field, too. 
Settings  f/4.8, 1/50, ISO 1250, 17mm

You might want to use a tripod or not.  Enjoy the holiday lights at night this season and let’s see your best shot or two!  Nicole – this ones for you!  Have fun everyone!

Depth of field is the distance between the camera and the nearest and farthest parts of the subject that appear to be in sharp focus.  The amount of depth of field in the image is a function of the interaction of two factos:

1. The image magnification (with a given focal length, determined by lens-to-subject distance).

2. The f-number to which the lens is set.

Depth of field can be varied by changing either factor, or by changing them both.  With any given lens, decreasing the subject-to-camera distance -the purpose of increasing the image magnification-will decrease the depth of field, and vice versa; increasing the size of the lens aperature will also decrease depth of field, and vice versa.

Ok so all that above is the technical aspects of depth of field and what’s happening in the camera to cause a desired effect.  Why would you want to have narrow or deep depth of field.  Some of the practical ways of thinking about this are: In scenic pictures you are probably looking for a very broad or deep depth of field.  You probably want the whole mountain from any foreground flowers to the farthest mountain top to be in focus.  Google Ansel Adams work to see some really incredible pictures that have wide depth of field.  The detail and sharpness is incredible in his work.

Now a shallow or narrow depth of field is really useful for portait photograhy, sports and nature photography.  Being able to soften and de-emphasize the background from the subject can help make your subject the real star of the show by taking away other images that could distract from your subject.  Some examples of this for portraits are having the background  go blurry and turning into a soft backdrop of sorts.  In sports work, simetimes a slow shutter speed will actually be used so that let’s say the runner is in focus and everyone else is out of focus.  This helps to highlight that one particular runner rather than the whole group.  And in nature photography like portrait photography having the background blur a bit creates a nice background for your bird or animal or butterfly.

Please google depth of field and learn some more.    For our assignment this month I thought it might be fun to add to what we learned about composition and now depth of field and see if we can capture something that shows a narrow depth of field or a blurry or soft background.  Carry your camera with you to your holiday events and see what you can capture.  If you are shooting with either a slr or a point & shoot and don’t want to shoot manually – set your camera to the portrait button — that will automatically tell your camera that you are looking for the foreground subject to be in focus.  For the slr users – it probably is setting your camera aperature to 5.6.  If you want to try some manual settings you’ll want to either stay at f5.6 or go to a bigger lens opening…a smaller f stop number.  So in essence you’re looking for f-stop 1.4 to 5.6.  Past this and your deph of field is going to change and go from narrow to wide.  Some of the slr cameras actually have a depth of field button that you can push so that you can actually see the depth of field happening in your shot.  Check out your camera manual to see where your button is and how to use it.

I hope all this makes sense it’s a little technical but really good to learn.  Feel free to email me if you need some photo examples to help explain this.  I’m also very interested how you feel about how this technique turns out for you.

Photo’s due by January 5 in case you have some great New Years opportunities for shooting.  Make sure you include your camera information if you can.

I had every intention of taking numerous Thanksgiving Day photos, both traditional and not. But my family wasn’t having any of it, so I took the shots I was able to sneak. Here’s Henry performing his traditional role of carving the turkey.

Here again I had big intentions of getting shots of the dinner we made and having our friends really pose for some fun pictures with the food but when it was all said and done … we were all just hungry and I just got this classic around the table shot.  I should have used my tripod and self-timer and got in the shot too but it’s a nice memory anyway!  f3.5, 1/30/ISO 1800, 18mm

I had a hard time finding extra time to go out shooting this past month.  I ended up taking my picture on Thanksgiving day as we were driving back to Keith’s parents house in Lancaster County, Pennsylvania.  I liked this version the best because of the 2 cows in the background.  My other pictures of them you couldn’t really see their heads that much.  I never thought the picture I would end up with was 3 cows but there you have it.  On a funny note – Keith was trying everything to get the cows attention…this was one of few where she actually looked at me.  f8, 1/1000, ISO 3200, 170mm

On the top ~ My first football game ever – USC homecoming. This is a picture retaken after thinking of the rules described in the assignment.  100 ISO, 1/100, f/8, 36mm

Waiting ~ I love downtown Los Angeles and I love to take evening pictures with a longer exposition. This one has both.  Handheld, 1600 ISO, 1/3, f/8, 49mm

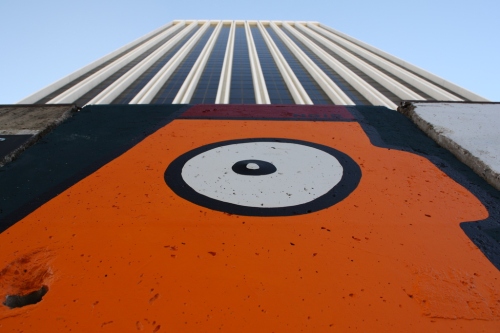
The Eye ~ This is a piece of the Berlin Wall in Los Angeles, repainted by a German painter, known for his “heads with eyes”. I hope it mirrors “the wall feeling”.  100 ISO, 1/60, f/5, 18mm

This photo was taken along the Marginal Way, a walkway along the ocean at Ogunquit, ME—it was in the 60’s in late November!  Beautiful weather and beautiful scenery.

Cape Porpoise, Maine photo = docks where the lobster boats come in; we went there to find lobster rolls for lunch, but even though the restaurant was closed for the season, it was worth it for the view!

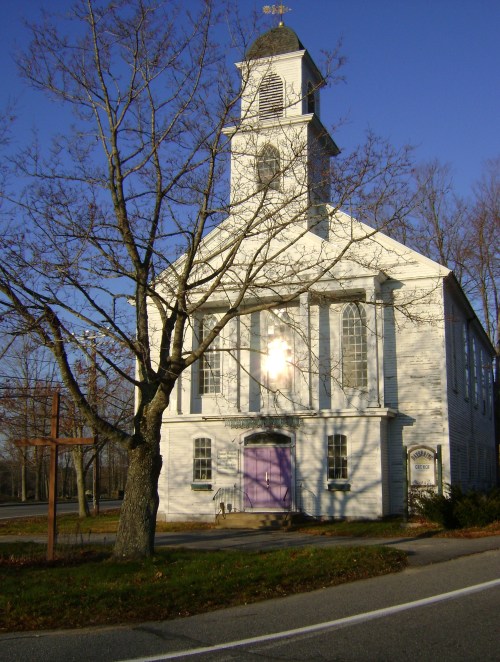
I happened by this church in Bolton, Massachusetts on my drive home from visiting friends in NH before Thanksgiving; was prompted to take back roads on the drive home and found lots of photo opportunities this way; this shot doesn’t show it, but there was a For Sale sign near the plain wooden cross in front of the church.